
VENDAX DNB PRO — Skin Retouching Panel for Photoshop
This website introduces VENDAX products. Sales and downloads are not available yet.
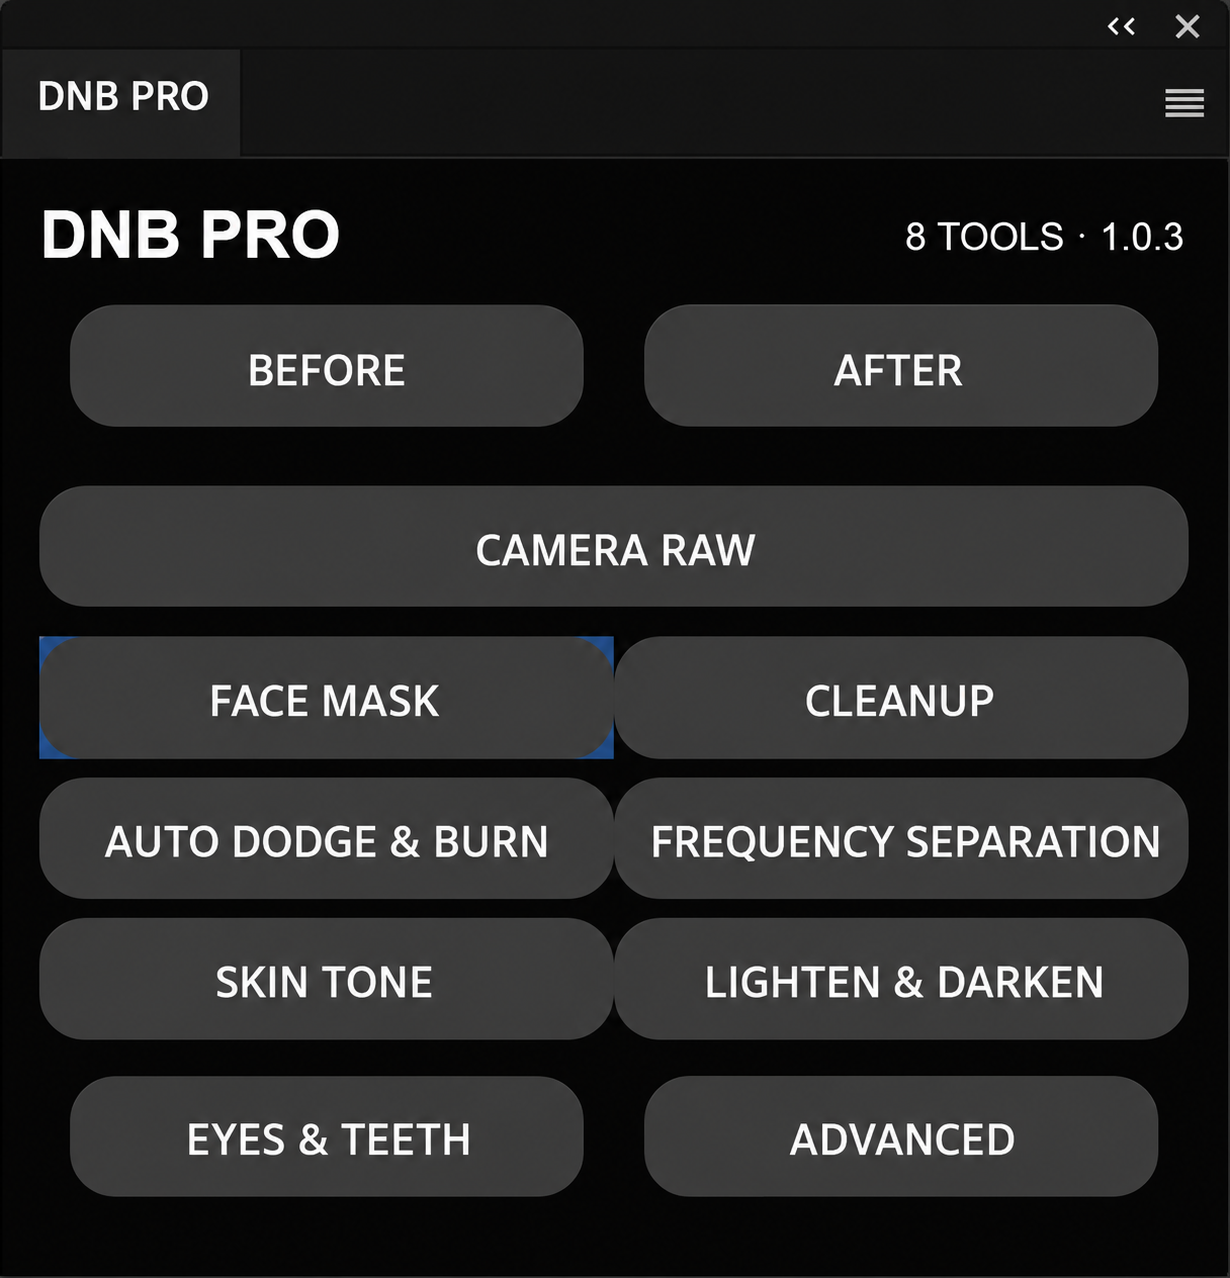
Skin and portrait retouching panel for Photoshop
VENDAX DNB PRO brings facial retouching tools together in Photoshop: skin masks, pore cleanup and corrections to skin color, eye whites, irises and teeth. Dodge & Burn and frequency separation help you work on light, shadow and texture. Editable layers and masks let you adjust results and preserve natural skin features.
Features and guideVENDAX DNB PRO — full tutorial
Video in English · 12:43
VENDAX DNB PRO — Complete user guide
Installation, masks, tools and saving your results — 23 sections for version 1.0.3.
Read the guide →Features and workflow
- FACE MASK — SKIN MASK — Purpose: isolate skin for retouching and protect eyes, lips, hair, background and other areas that should remain unchanged. 1. Click FACE MASK. CREATE MASK in the mask section performs the same task. 2. Wait for the mask to be created or opened. 3. Zoom in and check all faces, eyelids, eyes, lips, hair, eyebrows, glasses and…
- CLEANUP — SKIN AND PORE CLEANUP — CLEANUP opens PORE CLEANUP, CLONE and HEALING BRUSH. PORE CLEANUP opens detection and correction of small dark pores. CLONE selects a clone stamp on a separate manual-cleanup layer; HEALING BRUSH selects the healing brush there. ← BACK TO CLEANUP returns to tool selection. 1. Check FACE MASK and protect features you want to…
- AUTO DODGE & BURN — AUTOMATIC PROCESSING — Starts automatic retouching. Review the result and adjust individual stages on editable layers.
- FREQUENCY SEPARATION — Purpose: separately process broad transitions, medium details and fine texture. Independent of AUTO DODGE & BURN. LOW MAP is a blurred color map of broad light/color transitions. MID MAP shows medium details on neutral gray. HIGH MAP shows fine texture and pores on neutral gray. Maps help choose settings; they are not finished…
- SKIN TONE — SKIN COLOR — Reduces unwanted skin color variation while respecting its own hue and brightness. Preserve natural blush and makeup. 1. Check FACE MASK. 2. Click SKIN TONE. Starting from the main button sets strength to 35%. 3. Judge color in Clean view. 4. Adjust the selected result's Strength or the section's AUTO STRENGTH. 5. Compare…
- LIGHTEN & DARKEN — PAINTING LIGHT AND SHADOW — 1. Click LIGHTEN & DARKEN; the white brush activates. 2. Paint areas to lighten; the effect appears immediately. 3. Adjust White effect. 4. Click BLACK BRUSH and paint darkening. 5. Adjust Black effect. 6. Compare with local BEFORE / AFTER. WHITE BRUSH selects an independent lightening layer and white brush. BLACK BRUSH selects…
- EYES & TEETH — EYES & TEETH opens EYES (eye whites and irises) and TEETH (teeth masking/processing). Each correction has its own mask, strength and comparison. 13.1. EYES → EYE WHITES 1. Click EDIT EYE WHITES MASK. 2. Inspect both eyes and refine the mask with brushes. 3. Click APPLY EYE WHITES MASK. 4. Adjust Eye whites and compare BEFORE /…
- MICRO D&B AND MACRO D&B — These additional sections handle tonal work and existing results. They are not the LOW/MID/HIGH bands of main AUTO DODGE & BURN. Opening them through Advanced does not create an automatic result. 03 MICRO D&B: AUTO STRENGTH, 0–100%, initial field 20%, controls the existing automatic MICRO result. AUTO BEFORE / AFTER compares…
- CAMERA RAW — FINAL COLOR PROCESSING — CAMERA RAW creates a snapshot of the currently visible result as a separate Smart Object and opens the Camera Raw filter. EDIT CAMERA RAW reopens settings for the selected/latest Camera Raw snapshot. NEW FROM CURRENT RESULT creates a new snapshot of updated retouching; previous Camera Raw settings are not automatically copied.…
- FINISH, LAYERS AND SAVING — ADVANCED → 08 FINISH: BEFORE ALL temporarily disables DNB retouching while remembering its state. RESTORE AFTER restores result visibility and strengths. CLEAN VIEW — HIDE CHECKS hides diagnostics, technical views and overlays. 100% checks the photo at 100%; 200% enlarges masks and correction edges; FIT fits the photo to the…
Read the guide
Start with the guide and watch the recorded workflow in the full tutorial.